Shape MCP server
Shape runs a Model Context Protocol server, so assistants like Claude, ChatGPT, Cursor and Raycast can work with your training. Connect once and your assistant can look at what you have done, then plan, create and edit workouts for you.
Server URL
https://shapecalendar.com/mcpConnect in 3 steps
Pick your assistant. Connecting takes about a minute and needs no token to copy or paste.
- 1
Add Shape as a connector
In claude.ai → Settings → Connectors, press Add and choose Add custom connector. Works the same in the Claude desktop and mobile apps.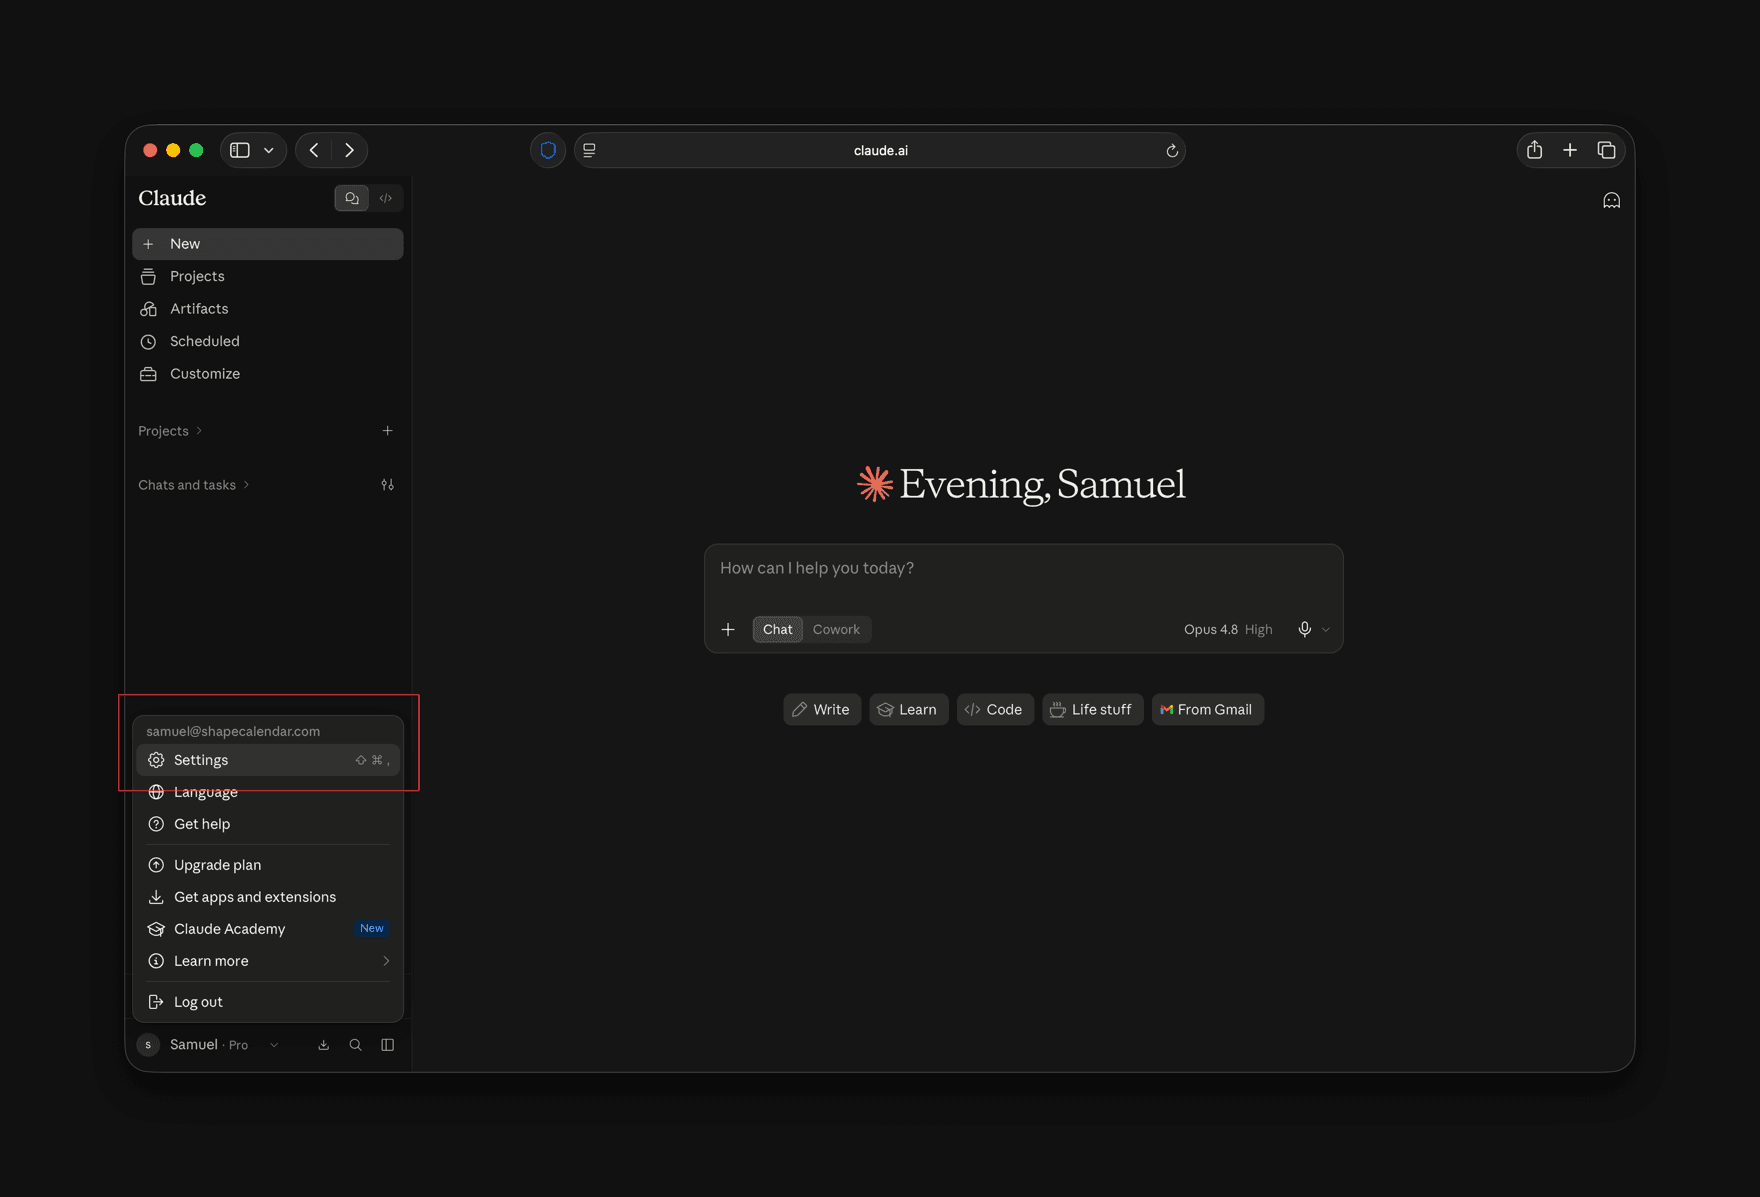
Open the account menu at the bottom left and choose Settings. 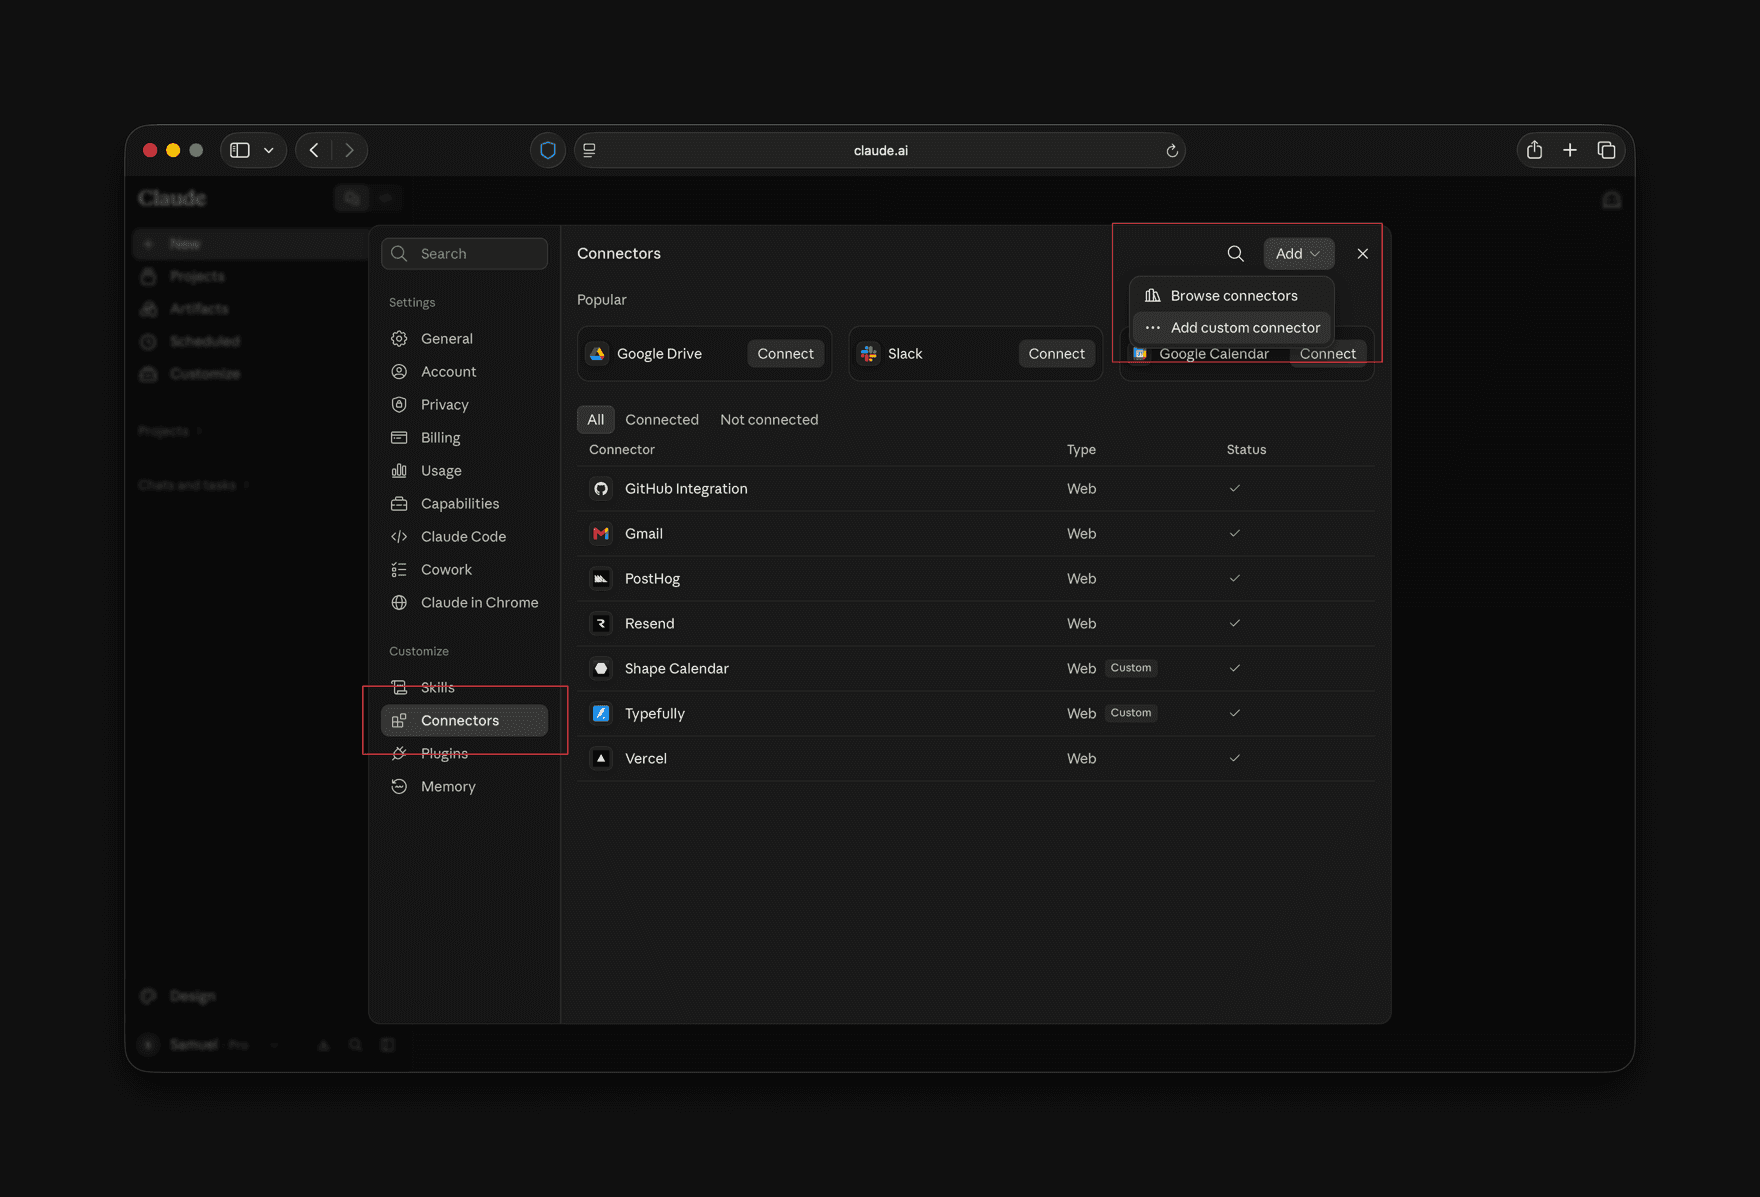
Go to Connectors, press Add, then Add custom connector. - 2
Paste the server URL
Name itShapeand paste the URL below, then press Continue.https://shapecalendar.com/mcp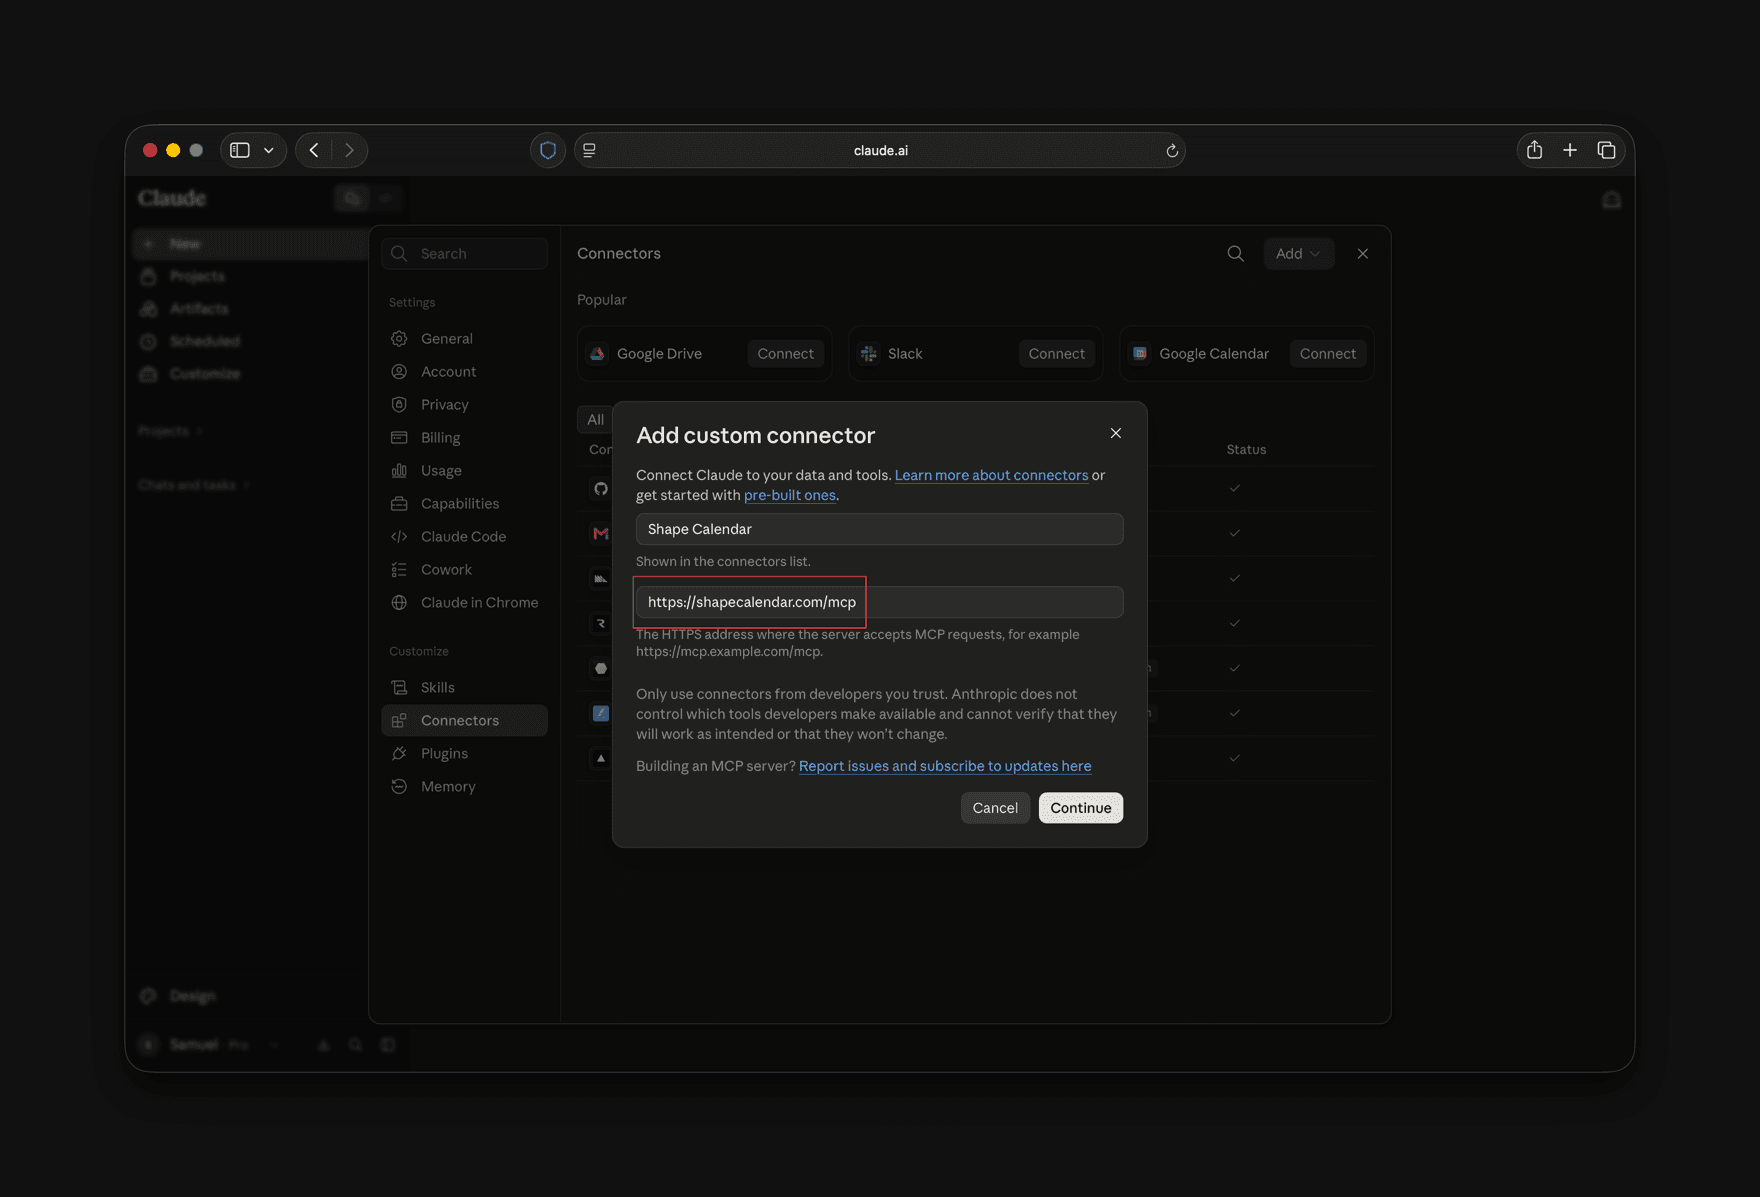
Give it a name and paste https://shapecalendar.com/mcp as the URL, then press Continue. - 3
Approve and allow the tools
Claude detects the sign-in method. Keep the defaults and continue. A Shape consent screen opens in your browser: sign in and approve. Then open the Shape connector and set Read-only tools to Always allow so Claude does not ask on every message. Try asking “What did I do this week?”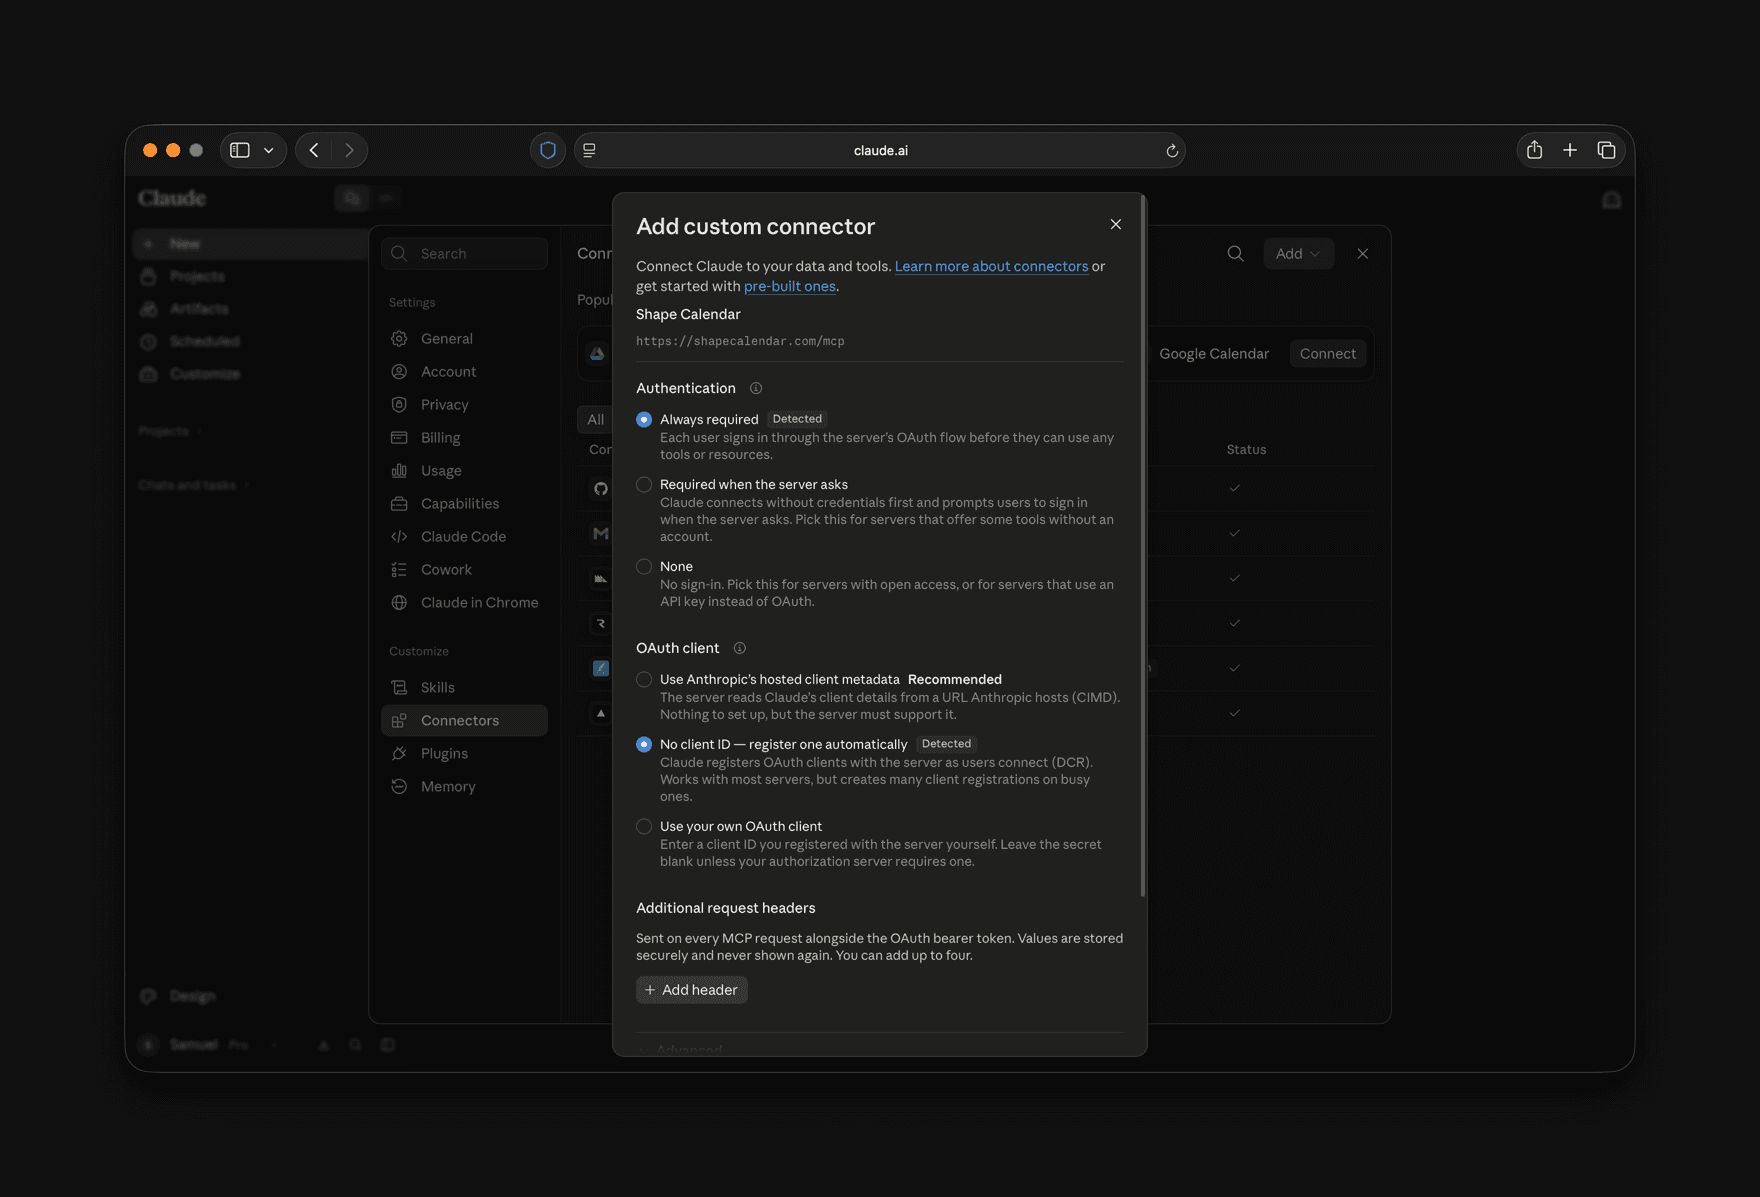
Claude detects the sign-in method on its own. Keep the defaults and continue. A Shape screen opens in your browser to approve the connection. 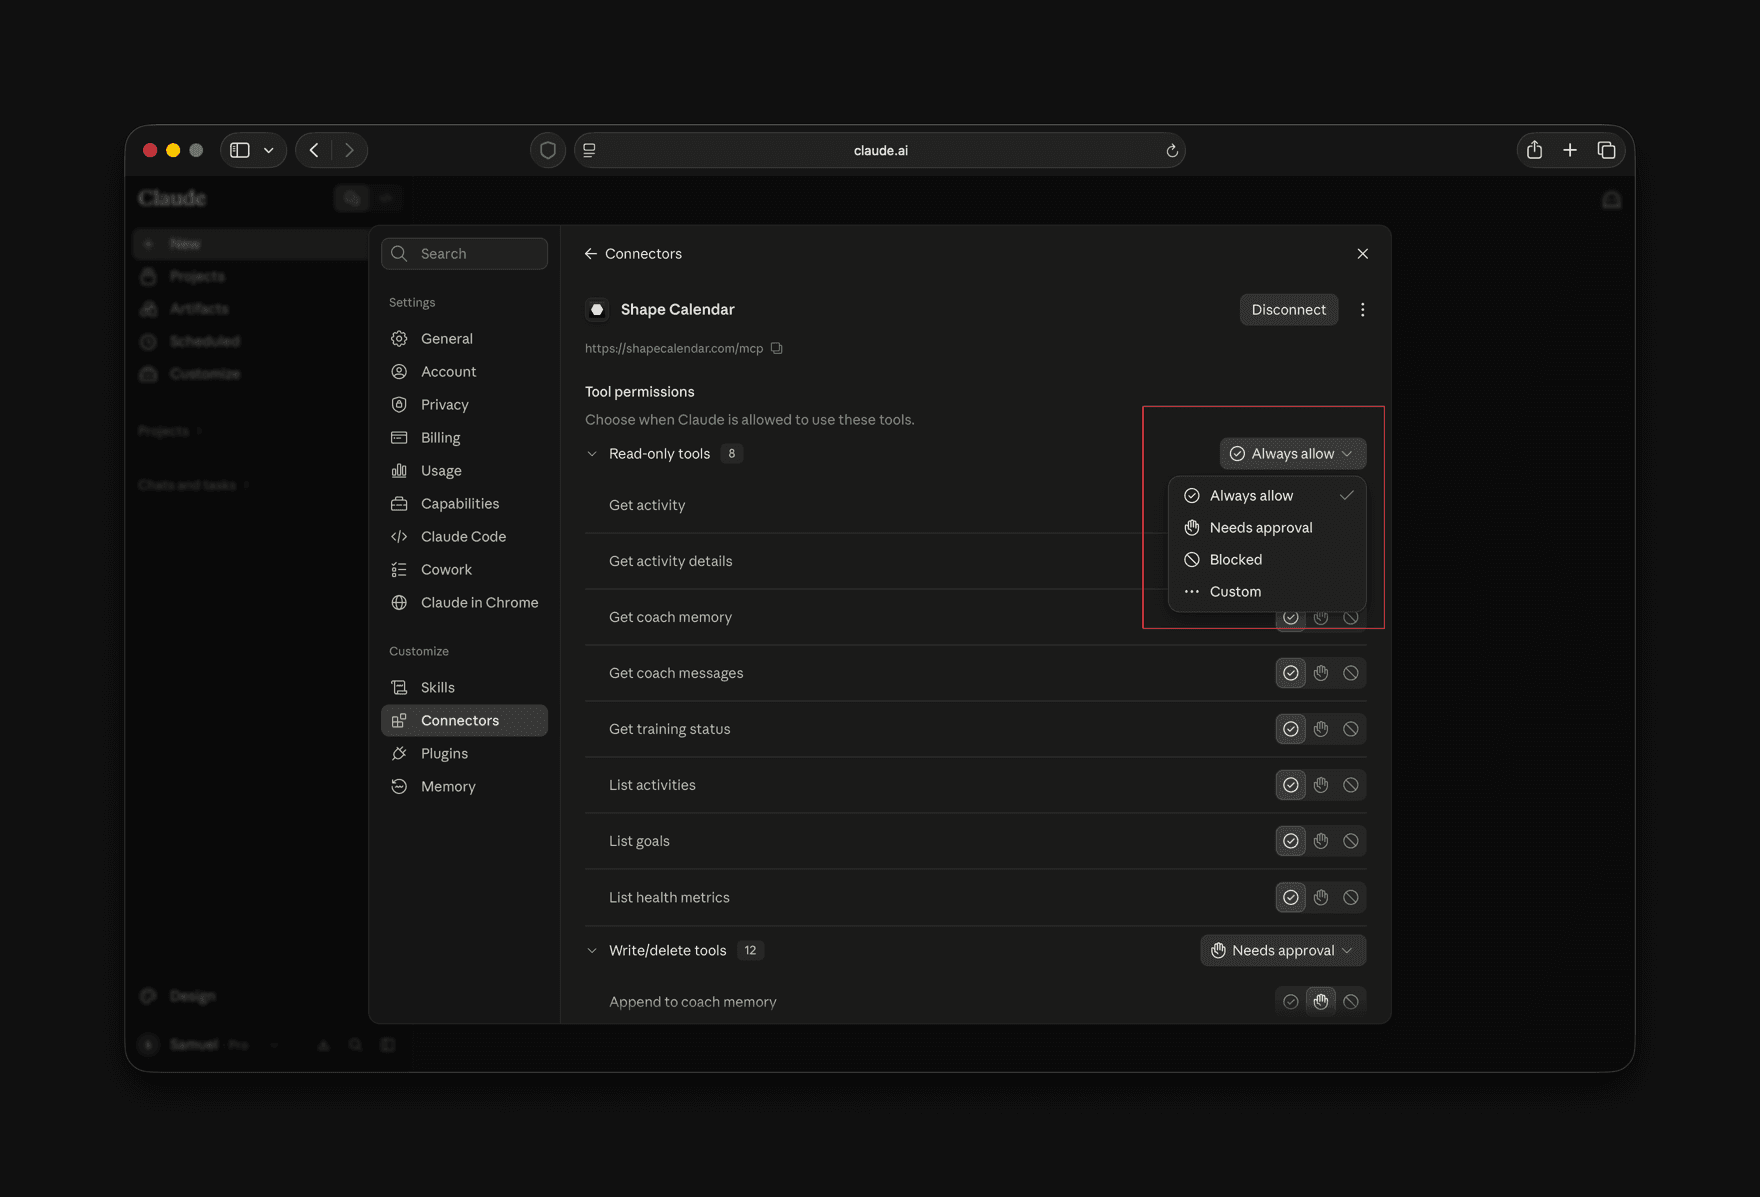
On the connector page, set Read-only tools to Always allow. Leave Write/delete tools on Needs approval if you want to confirm before Claude changes your calendar.
- 1
Turn on developer mode
In ChatGPT, open the account menu, choose Settings, go to Security and login and turn on Developer mode. Custom MCP servers need it, and it is available on paid ChatGPT plans.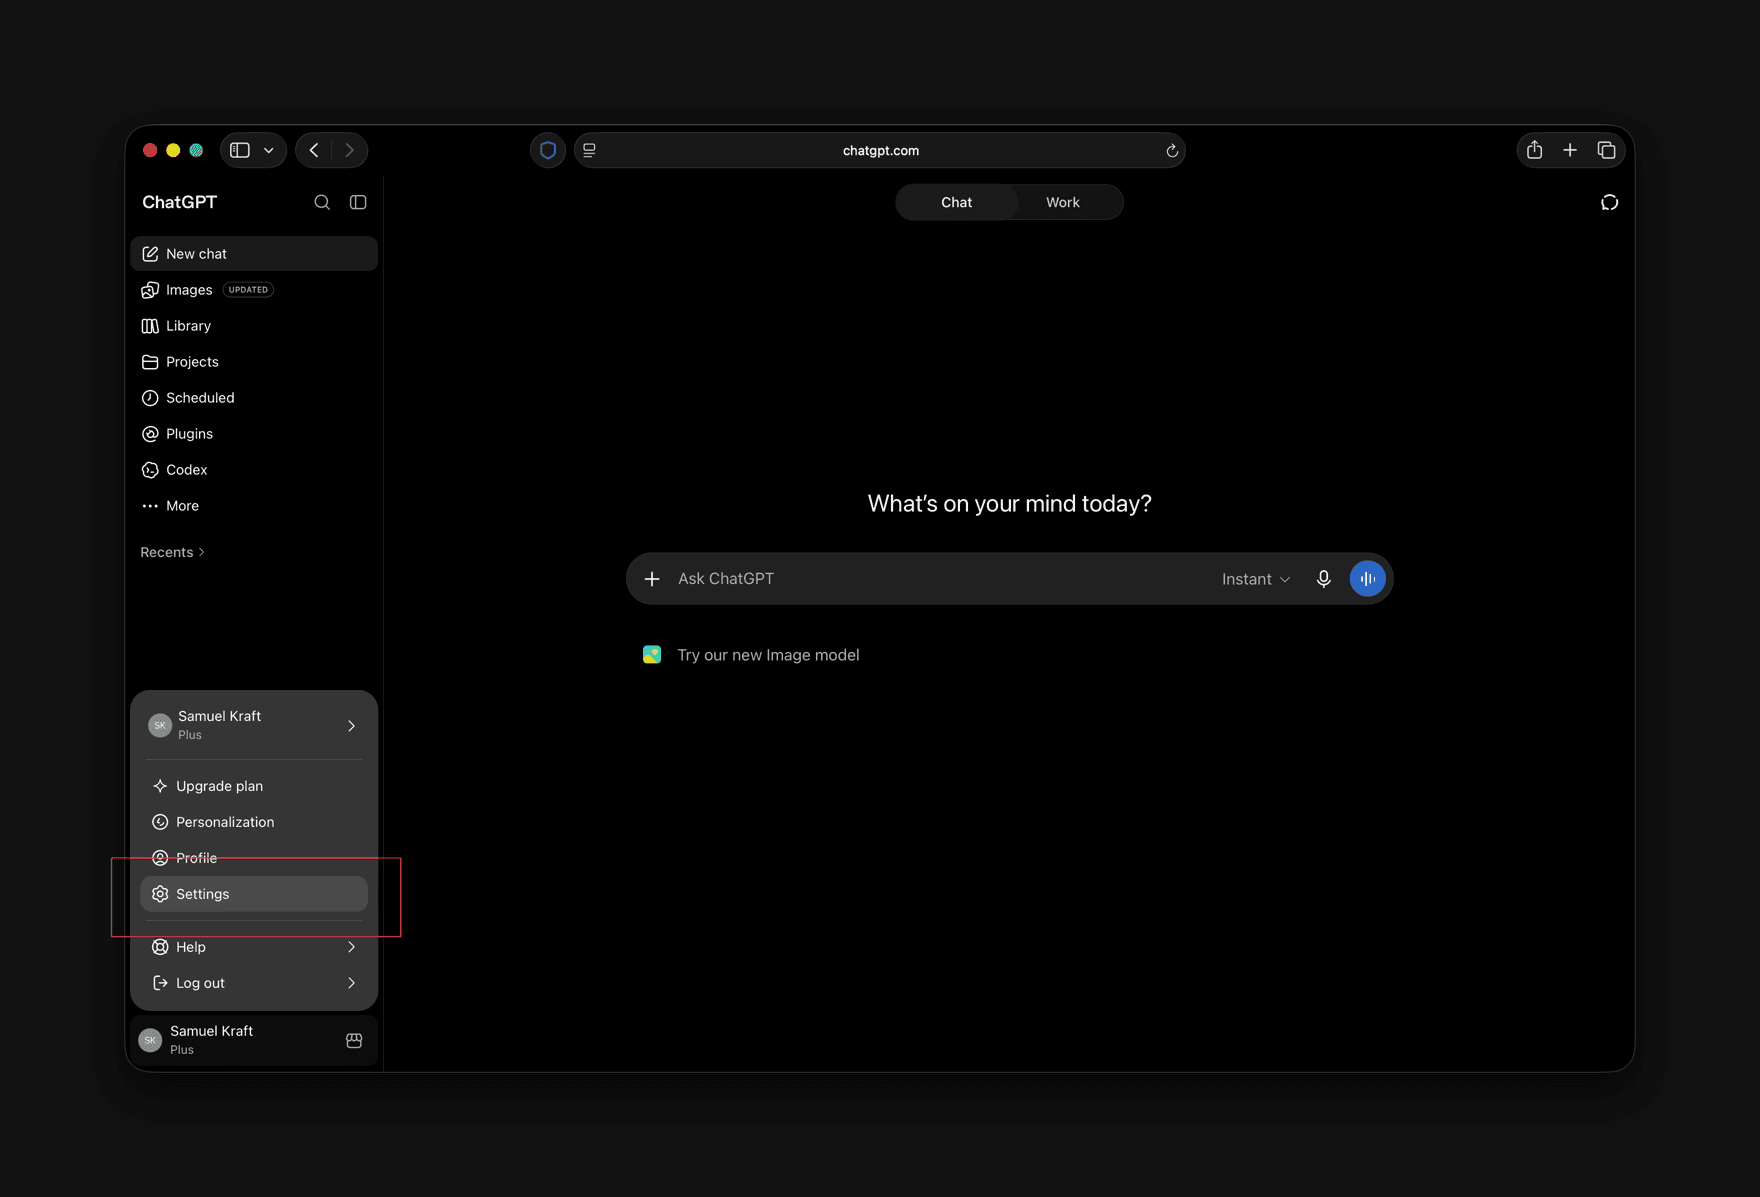
Open the account menu at the bottom left and choose Settings. 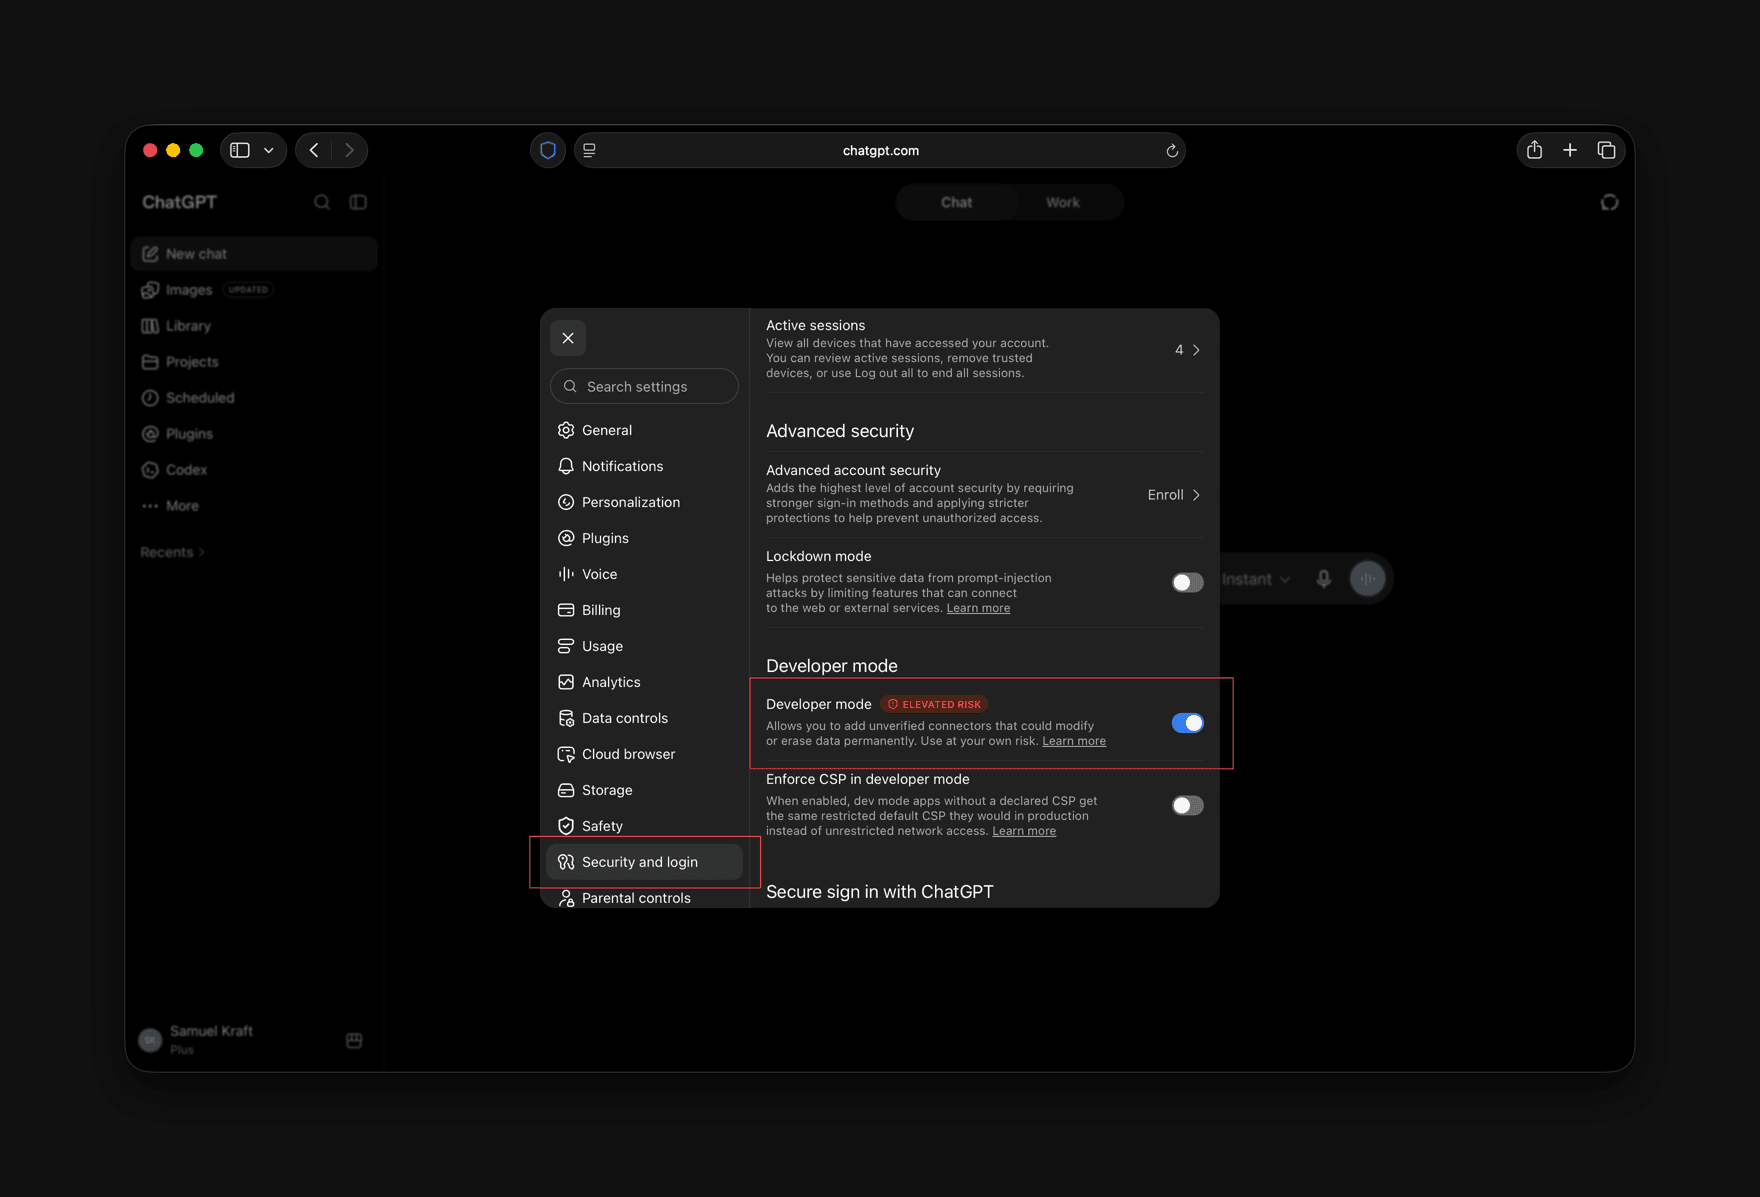
Go to Security and login and turn on Developer mode. Custom MCP servers need it. - 2
Create the plugin
Open Plugins in the sidebar and press the plus button. Name itShape, paste the URL below as the server URL, leave authentication on OAuth, tick the acknowledgement and press Create.https://shapecalendar.com/mcp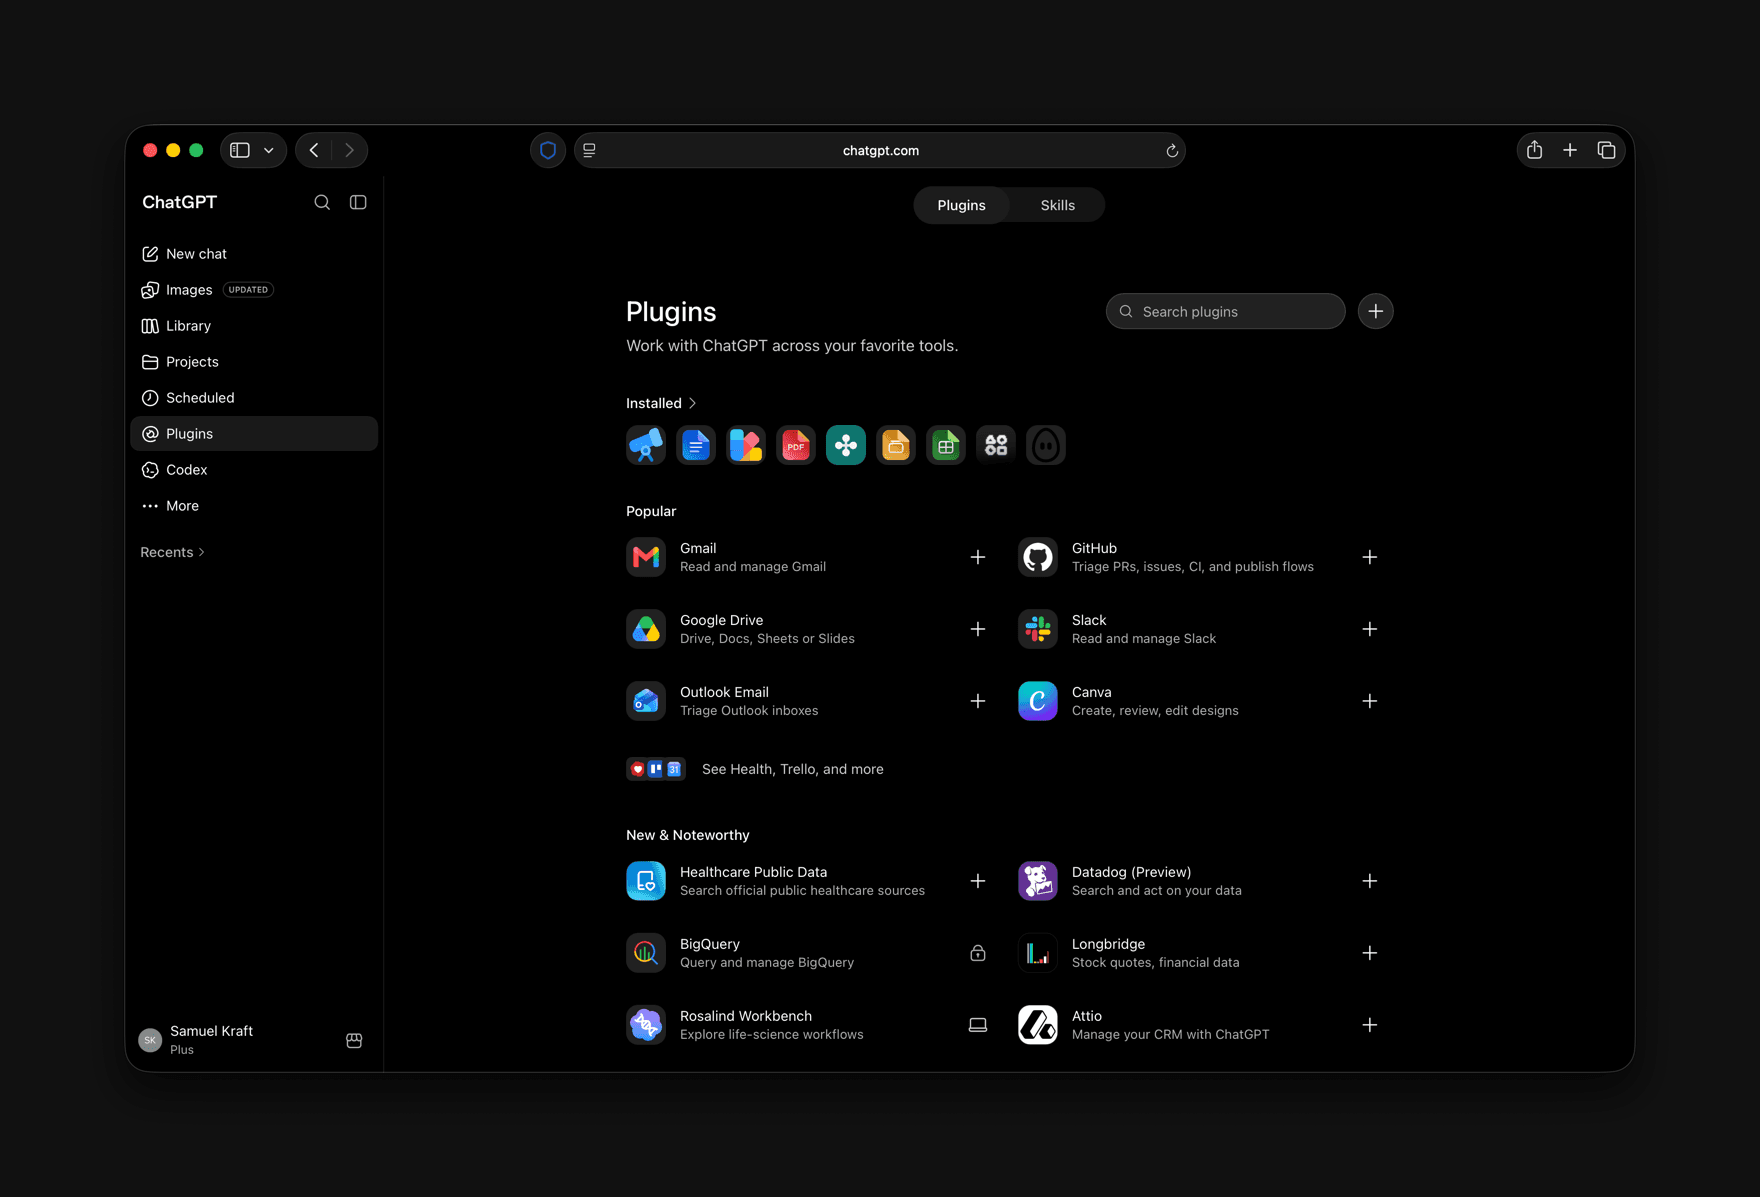
Open Plugins in the sidebar and press the plus button next to the search field. 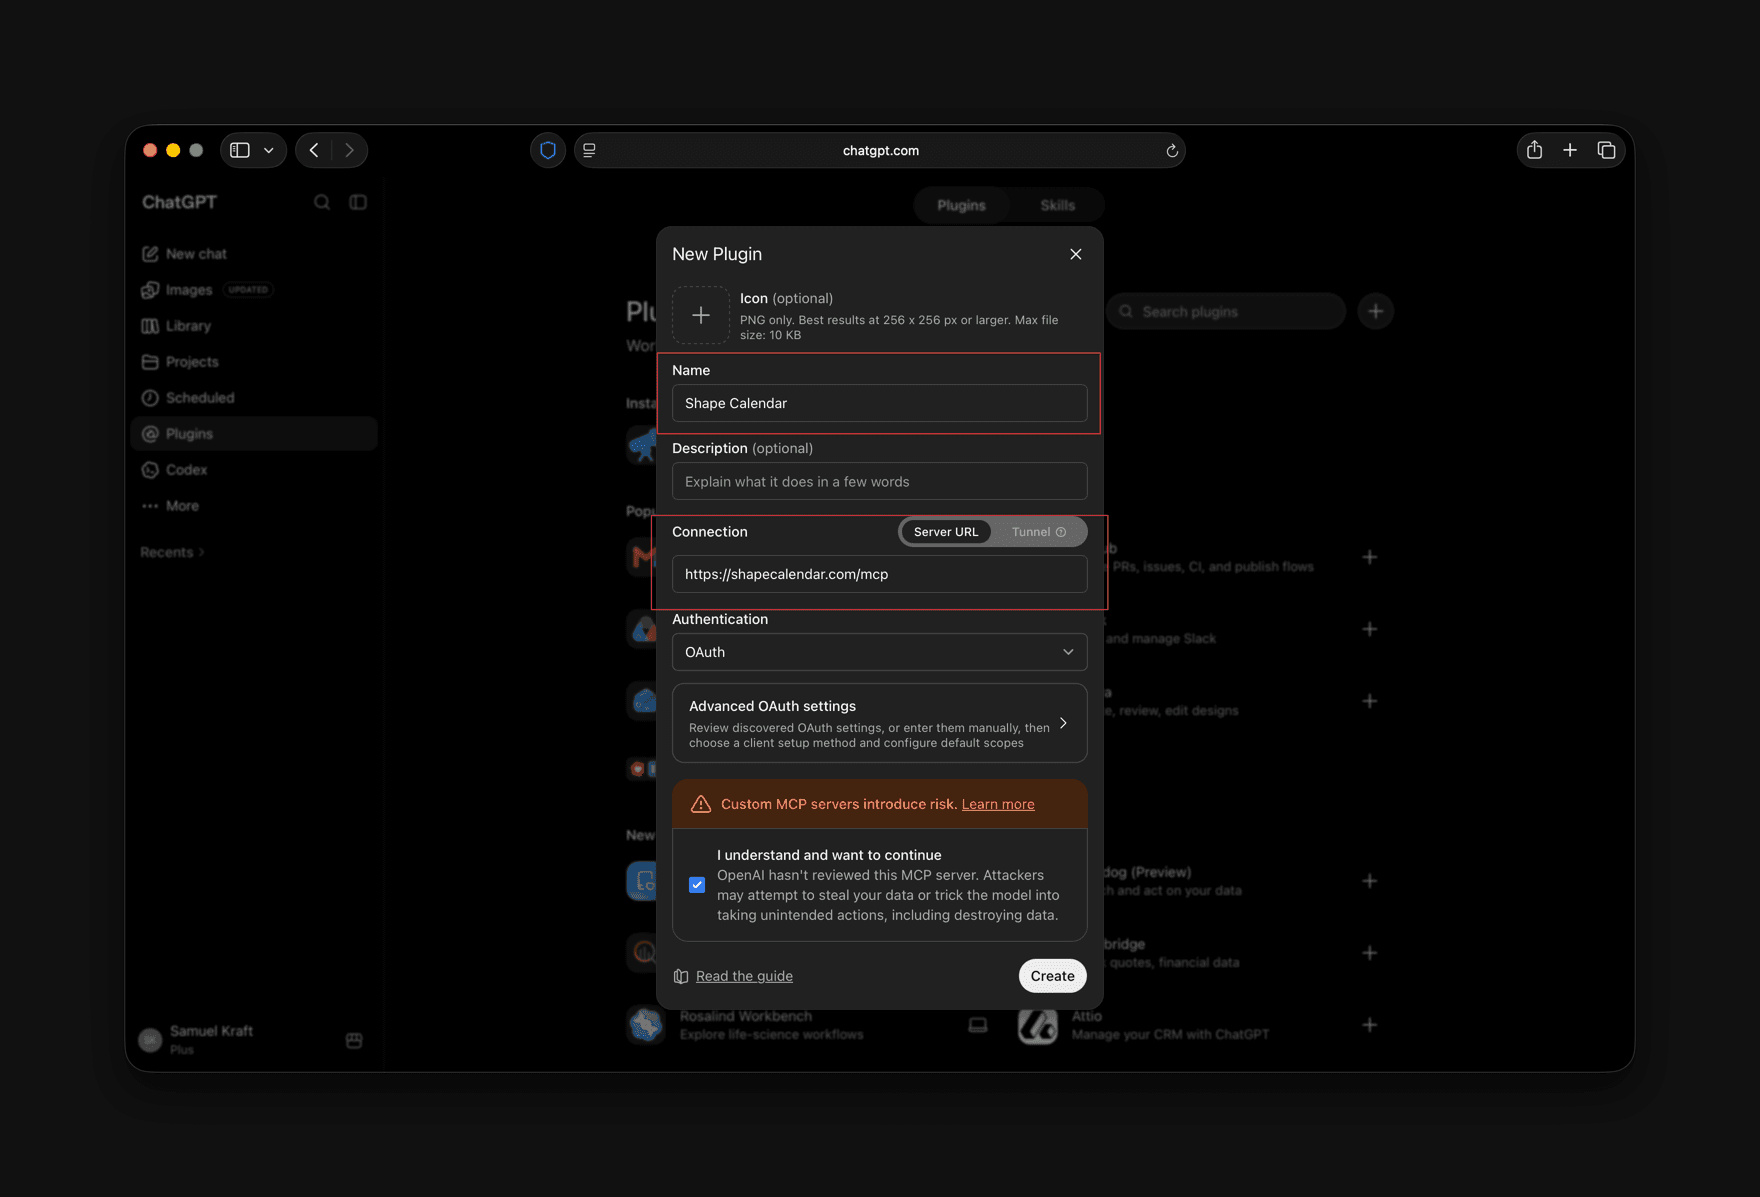
Name it, paste https://shapecalendar.com/mcp as the server URL, leave authentication on OAuth, tick the acknowledgement and press Create. - 3
Sign in and approve
Press Sign in with Shape Calendar. A Shape page opens: check the account and press Allow ChatGPT. ChatGPT confirms the plugin is installed. The default permission lets it read without asking and confirms before it writes. In a chat, pick Shape from the plus menu and ask “What did I do this week?”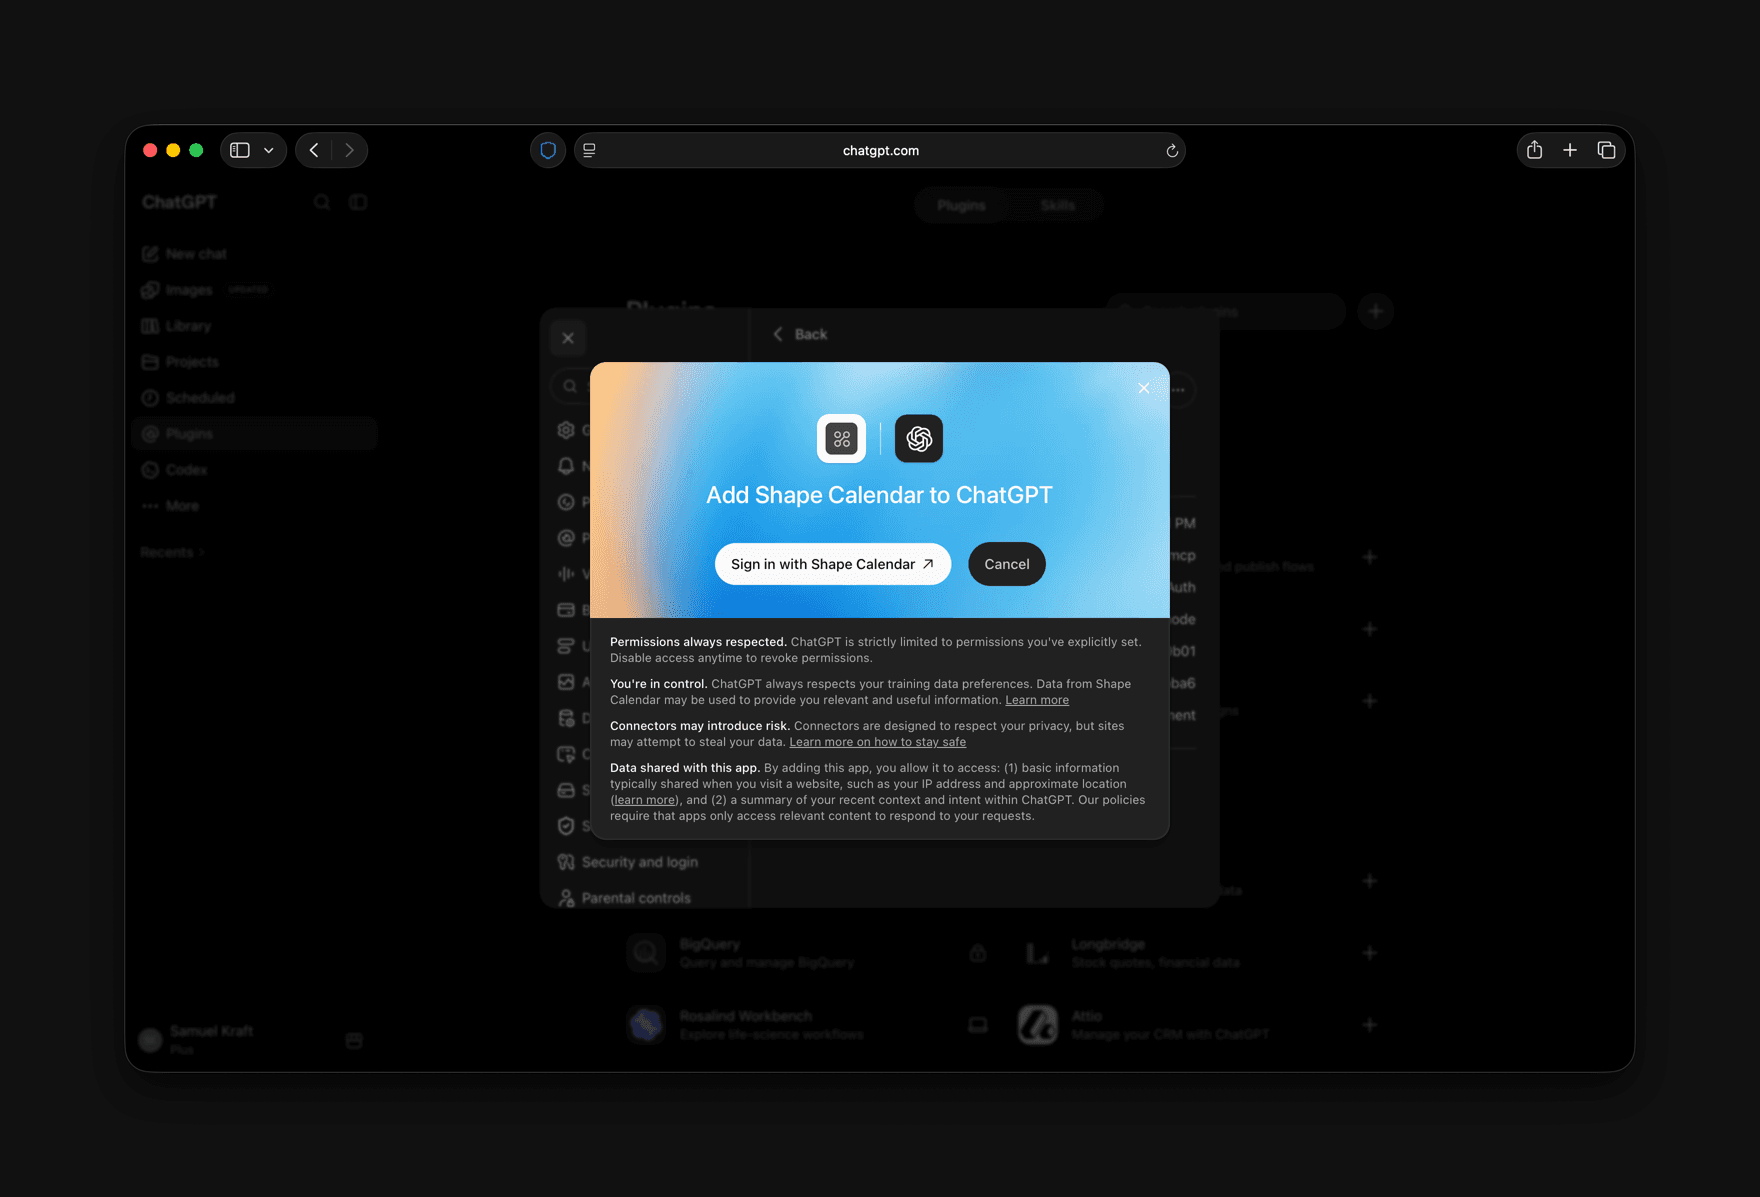
Press Sign in with Shape Calendar. 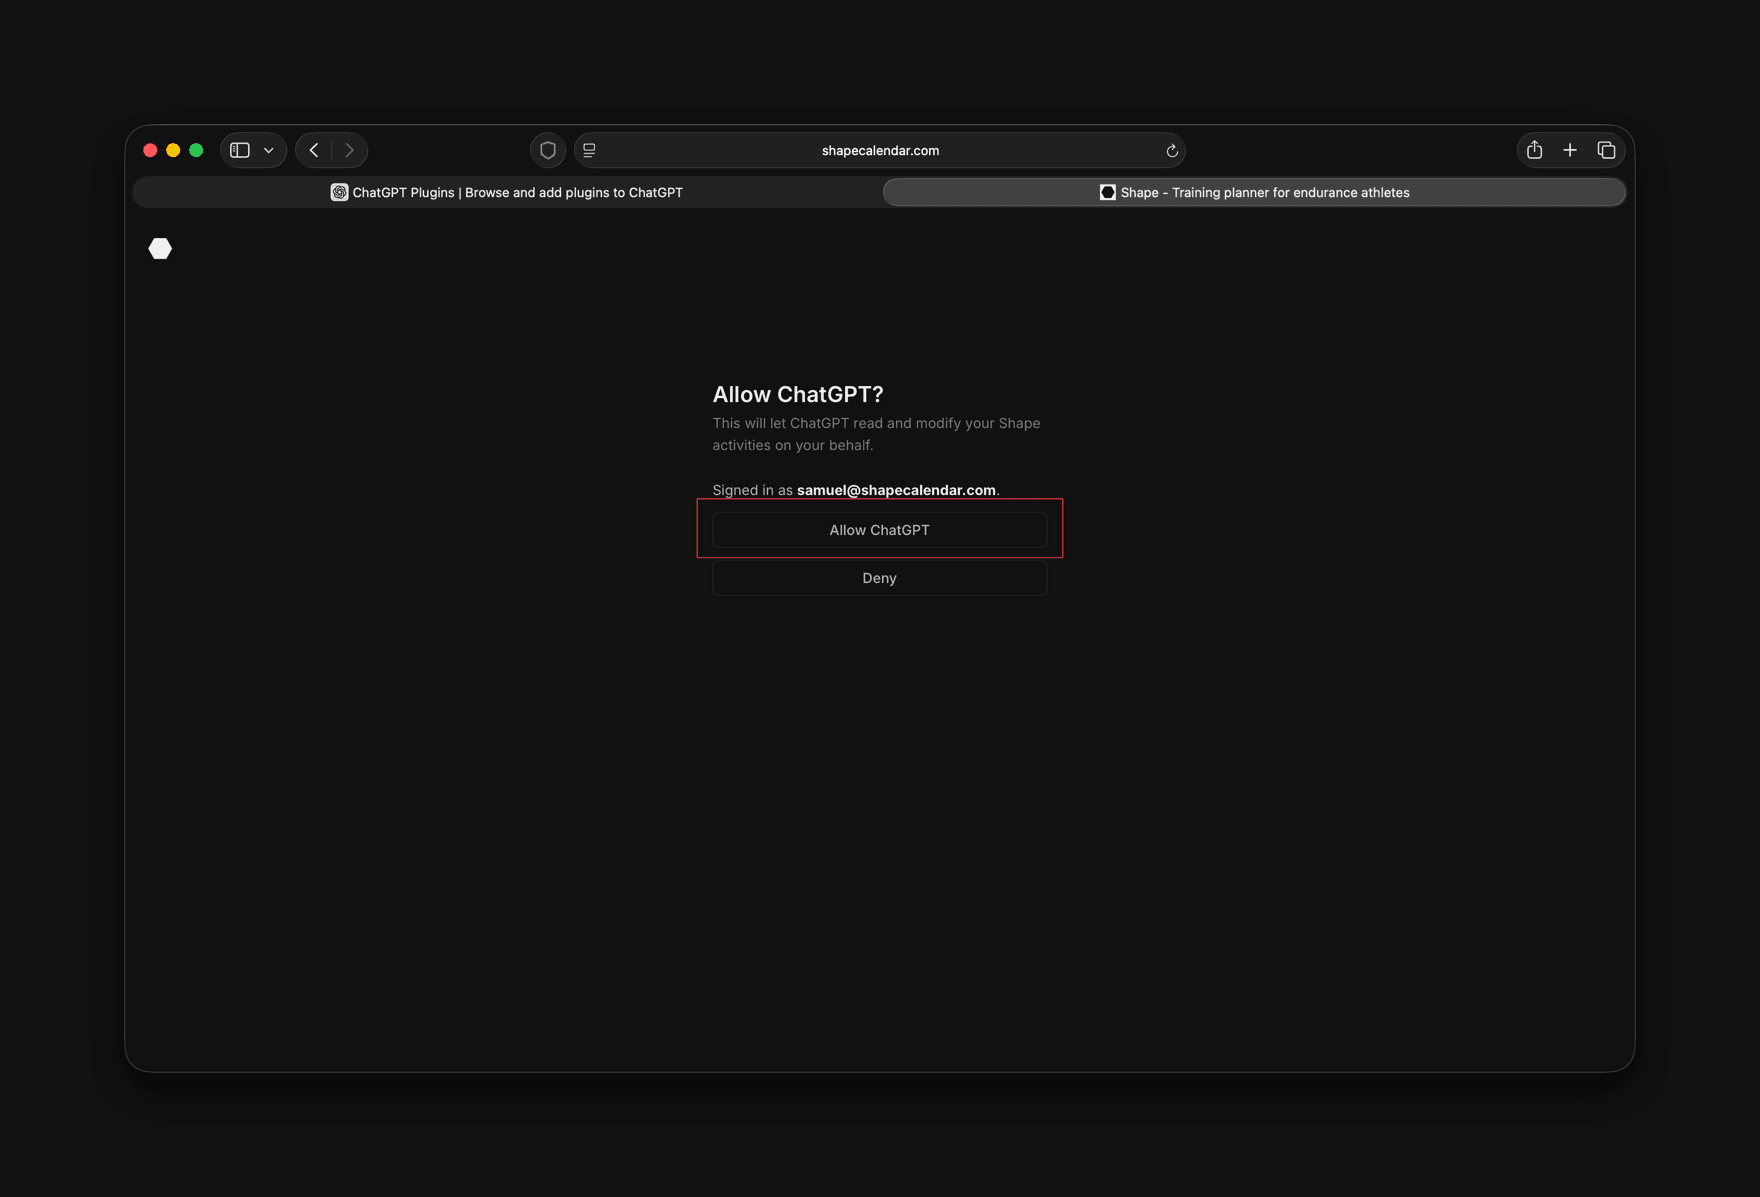
A Shape page opens. Check the account and press Allow ChatGPT. 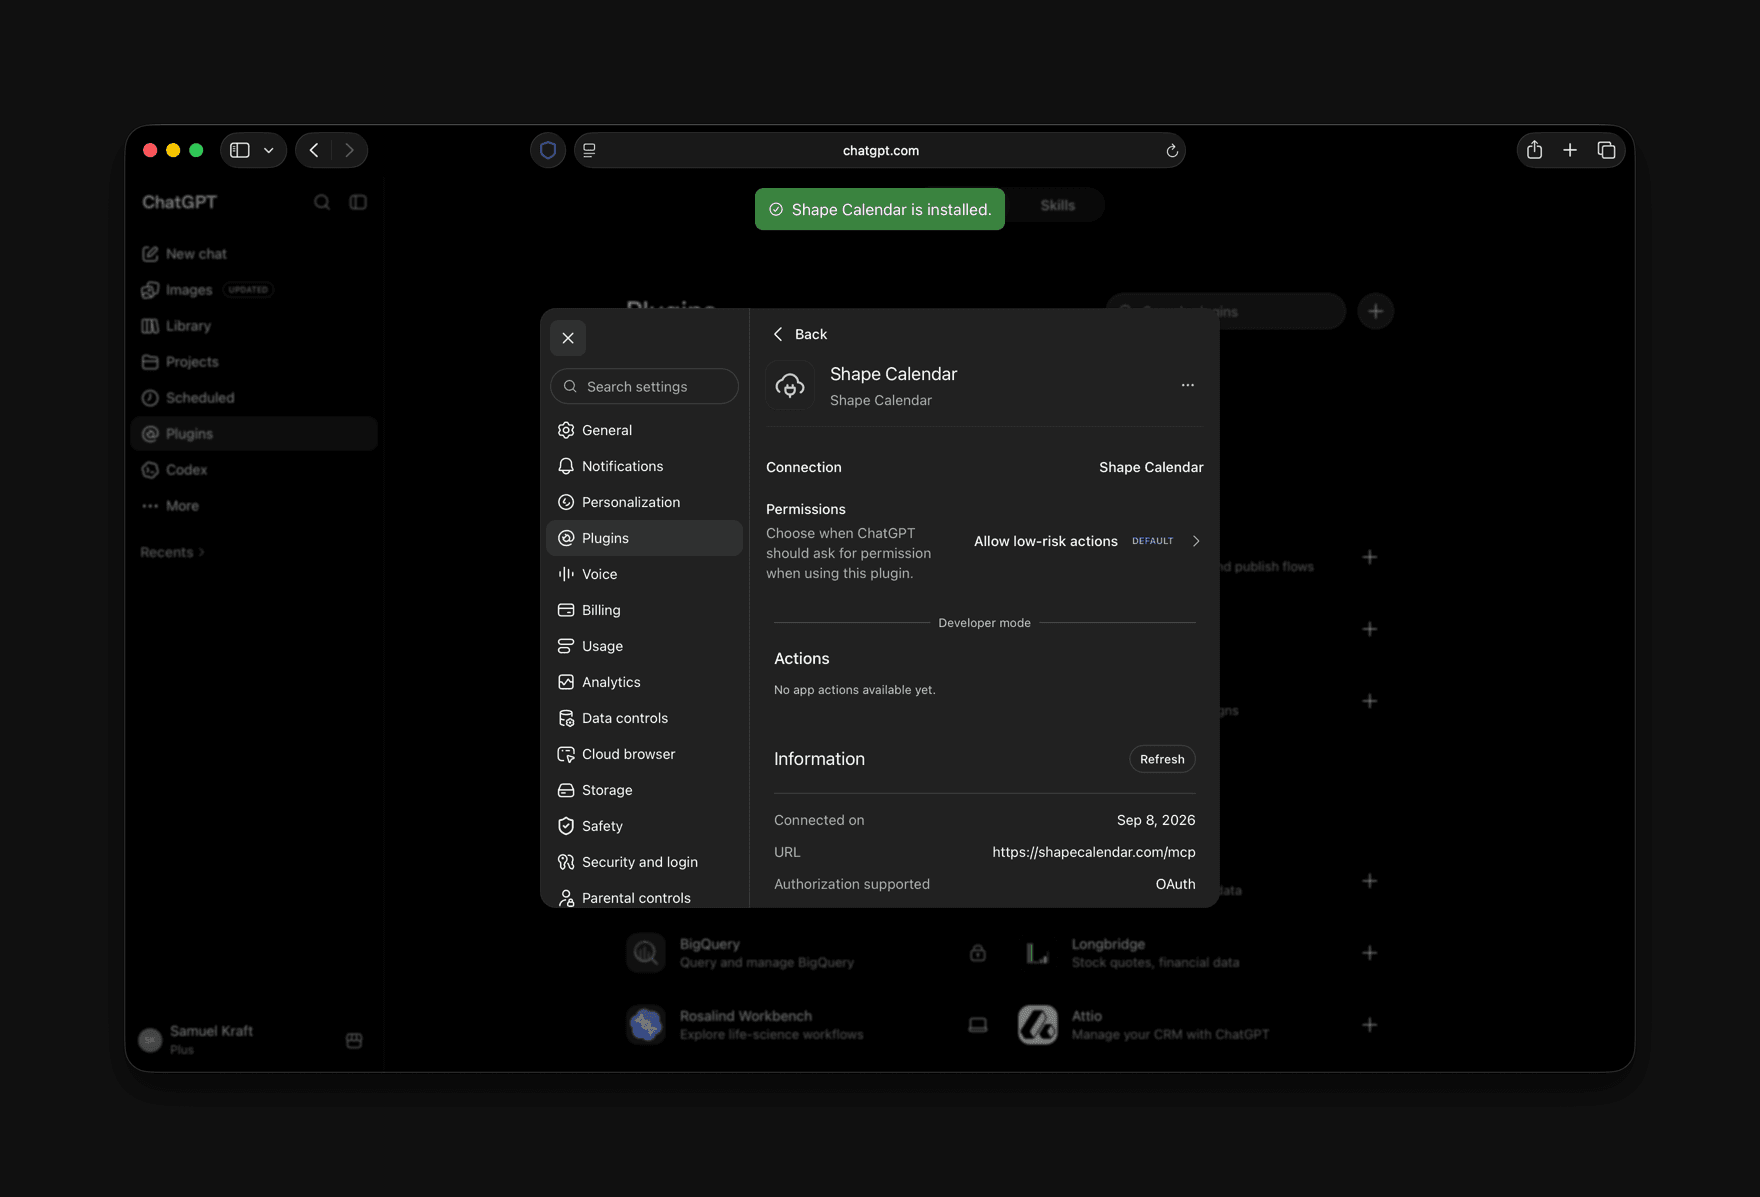
Shape Calendar is installed. The default permission, Allow low-risk actions, lets ChatGPT read without asking and confirms before it writes.
- 1
Add the server
Add the URL below as a Streamable HTTP MCP server in your client (Cursor, Raycast, Claude Code, or anything MCP-compatible).https://shapecalendar.com/mcp - 2
Authenticate
Clients with OAuth support open a Shape consent screen automatically. For clients without OAuth, create a token in Settings → API access and send it asAuthorization: Bearer shape_.... - 3
Example: bearer token config
For JSON-config clients like Claude Desktop or Cursor:{ "mcpServers": { "shape": { "type": "http", "url": "https://shapecalendar.com/mcp", "headers": { "Authorization": "Bearer shape_..." } } } }
Server URL and access
https://shapecalendar.com/mcp
Most clients handle sign-in for you. Paste the URL, a Shape screen opens in your browser, you approve, and that is it. Clients that cannot do that use a token instead, which you create in Settings → API access.
Either way, a connection can read and change your activities. Every connected assistant is listed in Settings → API access, where you can disconnect it whenever you want.
Example prompts
Once connected, ask your assistant things like:
- What did I do this week?
- How was my last workout?
- How much have I biked this month?
- How has my resting heart rate and HRV trended over the last month?
- Schedule a 10k run for tomorrow.
- Create a training plan for next week with a run on Monday, bike on Wednesday, and swim on Friday.
- Clear all my planned activities for this week.
- Pair my completed long run with the planned long run on the same day.
Available tools
Every tool is scoped to the authenticated user. Inputs and outputs mirror the REST API, so the same activity object and structured steps schemas apply.
List planned and completed workouts. Filter by date range, sport type, completed, or includePaired. A fulfilled plan is returned as the completed workout; fetch plannedActivityId for the plan's description and steps.
Fetch a single activity by id. If plannedActivityId is set, fetch that id for the plan's description and steps.
Recorded time-series for one completed activity: heart rate, pace, cadence, power, elevation, GPS and timestamps, plus lap splits and time in each training zone. Narrow the response with channels and points. Only activities recorded by a connected device have this.
List daily health metrics (sleep, HRV, resting heart rate, body battery, VO2max, body composition, blood pressure, steps), merged across your connected sources into one record per day. Filter by from/to, a single source, or a metrics whitelist. Defaults to the last 90 days.
How you're doing right now: readiness with the drivers behind it, fitness/fatigue/form and your acute:chronic ratio, and the next week of planned load. Call after planning with no dates. Pass from and to together only for history. The snapshot includes training already done today; a ranged series is morning readiness and never does, so the two can differ for the same date.
Create a planned or completed workout. Always set load on planned workouts. Set target=steps and pass a steps array for structured interval workouts.
Update any subset of fields on an existing activity.
Delete an activity. Any paired counterpart is unlinked.
Create up to 100 activities in one call.
Update up to 100 activities in one call. Each entry includes its id.
Delete up to 100 activities in one call.
Link a completed activity with the planned workout it fulfills.
Remove the pairing between a planned and completed activity.
Errors
Auth failures use OAuth-style responses. Tool failures return an MCP error result with isError: true and a human-readable message.
401: missing or invalid token. TheWWW-Authenticateheader points clients at OAuth discovery.400: malformed request (validation, bad JSON, etc.)429: rate limit exceeded- Tool error:
{ content: [...], isError: true }with the message in the text content
Rate limits
30 tool calls per minute and 200 per hour, per user, shared with the REST API. Use the batch tools when you have many activities to create, update, or delete.
REST API
Prefer raw HTTP? The same data is available over the REST API, using the same token.